Introducing the FeatherS2!
The PRO ESP32S2 development board in the Feather format!
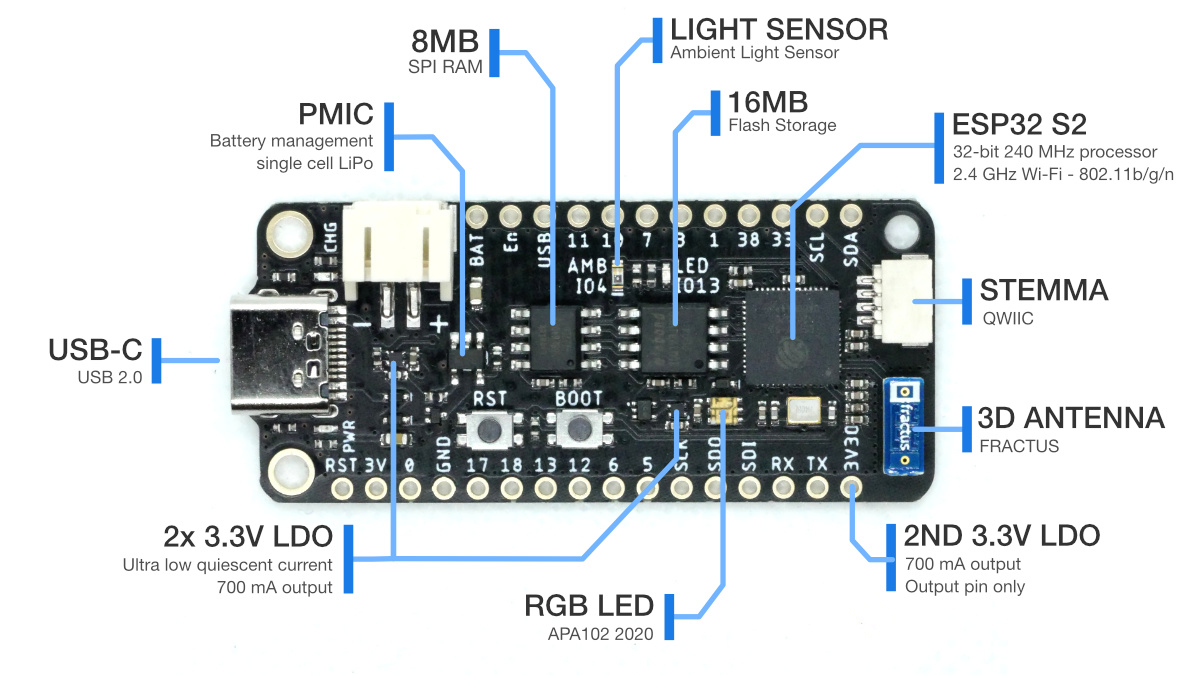
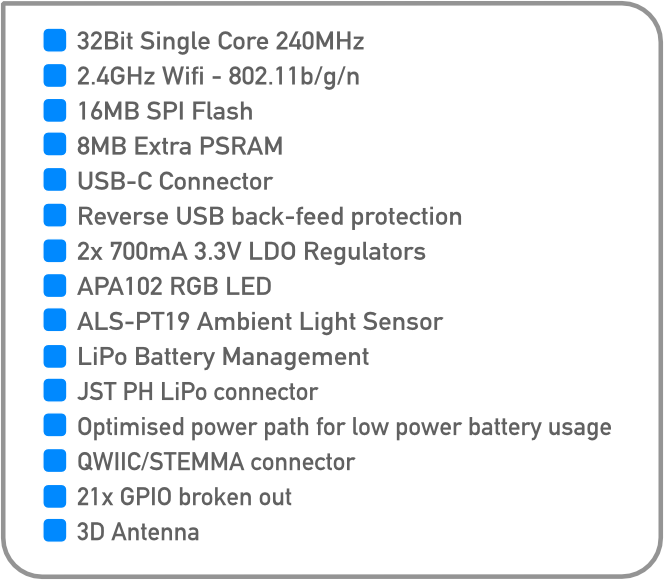
16 MB of Flash means you'll never run out of space for code or storage.
8 MB of SPI based external RAM - Insane!
Yup! The first one is for the general operation of the board and the ESP32-S2, RAM and Flash.
The second LDO is for you to use to connect external 3V3 modules, sensors and peripherals, and the APA102 RGB LED, and it has programmable EN control tied to GPIO21 + it’s connected to the deep sleep capabilities of the S2, so if the S2 goes into deep sleep, the 2nd LDO is automatically shut down for you!
Both regulators are ultra low noise and have ultra low quiescent current, and both support a maximum of 700mA output.
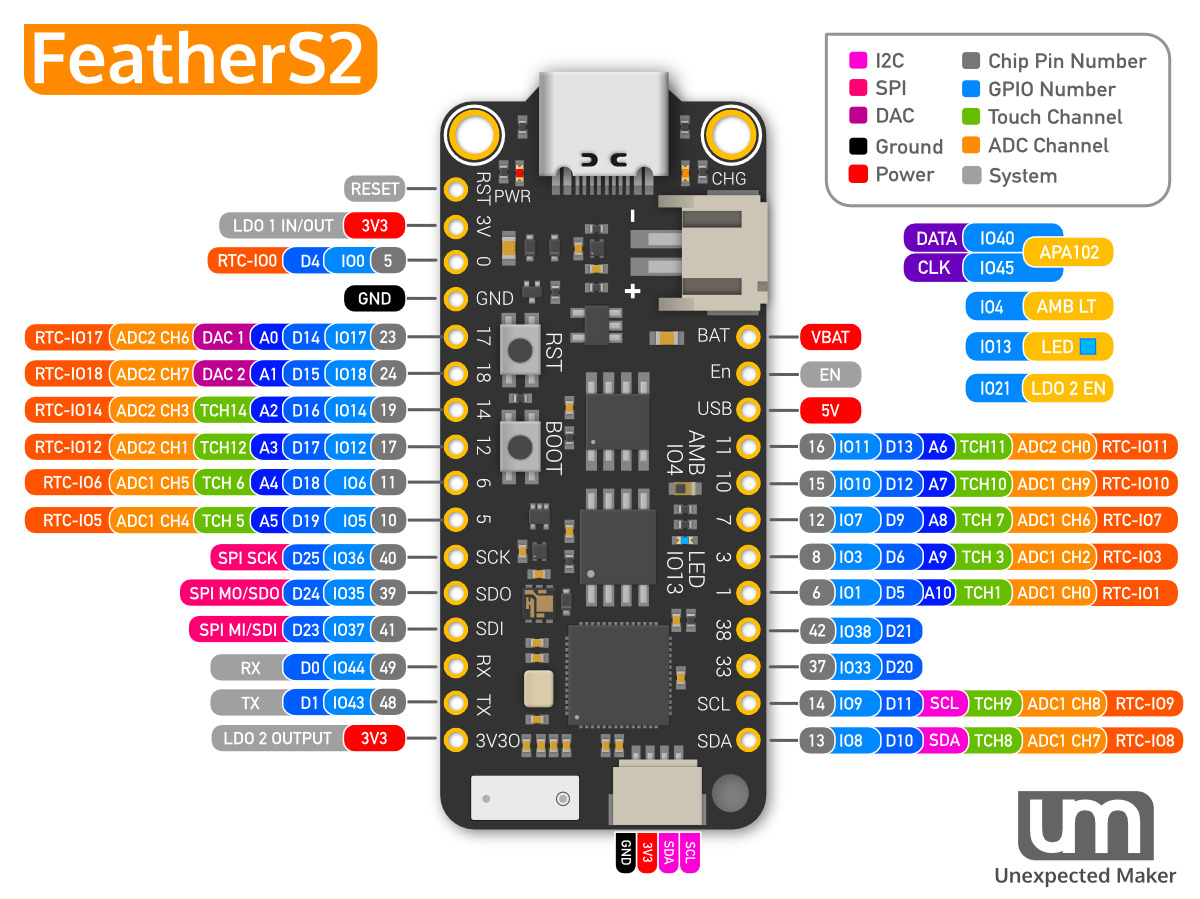
The FeatherS2 uses the new ESP32-S2 microcontroller from Espressif. It's one of their new generation of Sx MCUs that has the newer Xtensa LX7 core running at 240MHz, a RISC-V ultra low power co-processor, WiFi and built in USB. It's pretty slick!

Just plug your FeatherS2 into your computer and it will appear in your filesystem as a USB flash drive! Just copy your code over, or edit your code directly on the drive. Coding a microcontroller has never been easier!
As newer versions of CircuitPython are released, you are able to update as you require from circuitpython.org
If you need to grab the shipping CircuitPython code that comes with the FeatherS2,
you can grab the latest here


There is also ESP-IDF and Arduino support if you prefer coding in C++.
NOTE: To be able to use any ESP32-S2 board with the Arduino IDE you will need to make sure you install the latest ESP32 Arduino Core (2.0.0 or later)
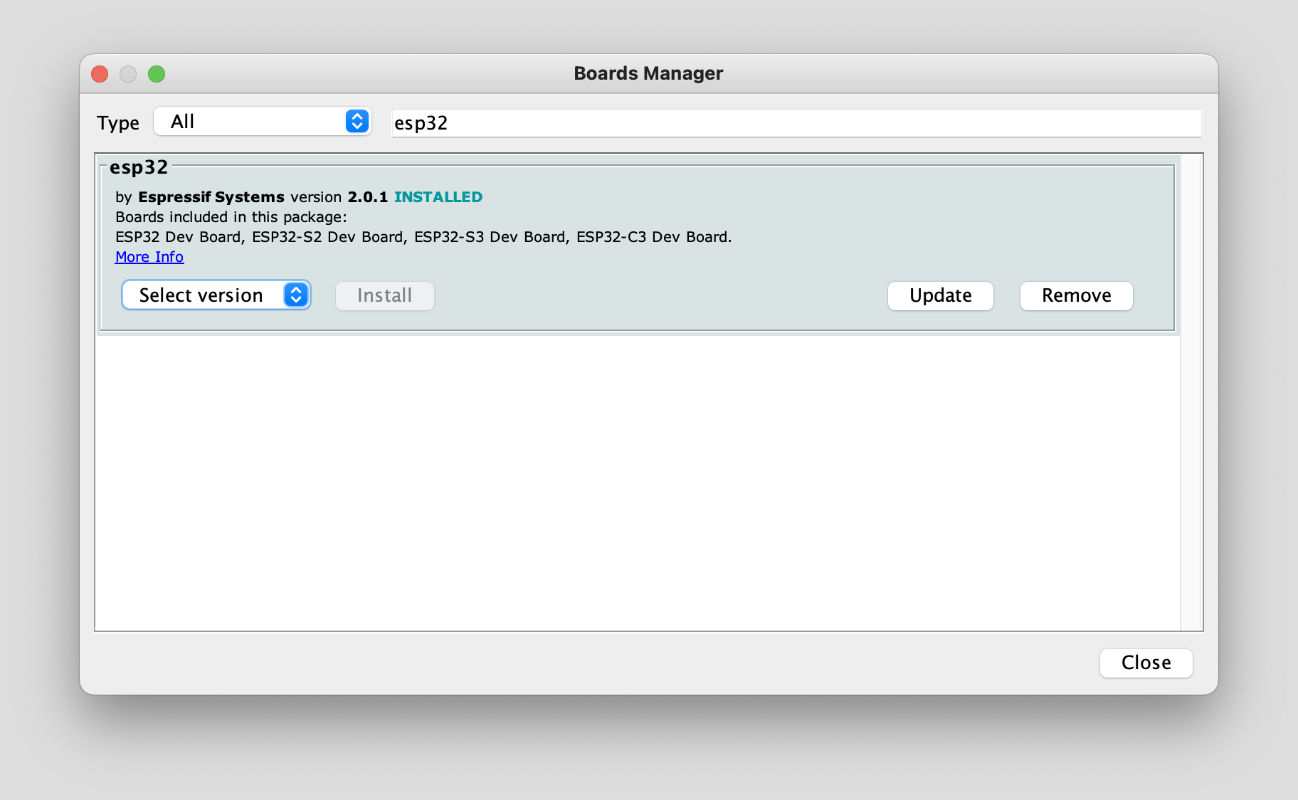 If you have not already setup your Arduino IDE environment to work with ESP32, please follow the official Espressif ESP32 Arduino Core instructions to install it.
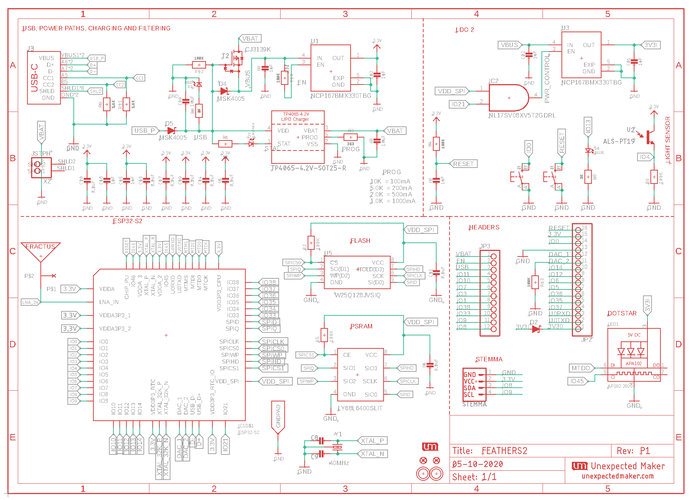
That is by design! The power and charge LEDs and corresponding 2K resistors drain the battery, so they have been isolated to the 5V power domain, so they will only light up and draw power when the board is either being power by the USB plug, or by a 5V power source connected to the 5V header pin.
That is the correct behaviour! The charge IC can’t tell the difference between a full battery and no battery, so it cycles between trying to charge and not charge.
If you have 5V power connected to your FeatherS2 before you plug your battery in, sometimes it might not start charging. Just unplug and re-plug in the 5V source and it should start charging correctly. This is a common issue with PMICs (Power Management ICs).
The FeatherS2 doesn't have a built in way of reading the battery voltage, sorry!
That's correct! The second LDO is tied to both GPIO21 and VDD for the Flash/PSRAM, so when the ESP32 goes into deep sleep, it automatically shuts down the LDO for you, so you don't have to remember to do it yourself.
The RGB LED (APA102) is powered by the second LDO. You need to enable the second LDO power via GPIO21 to be able to use the RGB LED. It's controlled this way to have the RGB LED power automatically shutdown when the ESP32-S2 MCU goes into deep sleep.
RX & TX are still connected to UART0, and still used with the USB when in CDC (download mode). Otherwise, you can use them as UART0 when connecting a module that uses serial, or use them as general IO, it's up to you.
If you currently have CircuitPython installed and you would like to use your device in the Arduino IDE or with the ESP-IDF, the first time you flash your board you will need to put it into download mode by holding BOOT, pressing RESET and then releasing BOOT. That will enable the CDC USB in ROM and you will be able to select the device to flash it.
The 5V pin on the FeatherS2 is an in and out pin. As an input, it will accept a voltage range between 4.8V and 5.2V. Please do not connect any power source over 5.2V to the 5V pin and please do not connect your battery to the 5V pin. It is for a 5V power source only.
When USB power is connected, you will get approximately 4.9V out of the 5V pin. The voltage drop is due to the reverse USB power diode that allows the USB and 5V pin to be power inputs at the same time, and prevents back feeding power into the USB.
The use case for having both connected is when you want to power your FeatherS2 from the 5V pin from an external 5V power source, but you also want to connect the USB to flash the board, or to get serial output.
To get your FeatherS2 into UF2 bootloader mode (assuming you have not stomped your CircuitPython install with Arduino/IDF or MicroPython) you can click [RESET], then about a second later click [BOOT] to get it into the UF2 bootloader mode. You will then see the RGB LED on your FeatherS2 turn Red while the device is unmounted, and then once mounted, it will turn green. It also may just go straight to green.
Newer UF2 boot loaders will flash the RGB LED purple when you need to press the boot button to go into bootloader mode.
A drive will appear in your filesystem called UFTHRS2BOOT. From here you can re-flash the latest CircuitPython firmware by copying over the firmware.uf2 file for the version you want to install.
You will see the RGB flash a redish orange colour many times during the copy, and then the FeatherS2 will automatically reboot itself and mount the new CircuitPython version.
There is a known issue where the firmware is copied and then the board reboots itself before your OS thinks the file has completed copying. The file did copy, and the FeatherS2 should have rebooted itself and you should see the mounted CircuitPython drive.
Yes! Newer versions of the UF2 bootloader to get released from time to time, and it's quite easy to update your bootloader.
Download the latest release version of the FeatherS2 bootloader from the tinyuf2 github releases page and un-zip it.
Note Updating the UF2 bootloader will require you to re-flash CircuitPython back on your FeatherS2.
Inside this folder you will find a file called update-tinyuf2.uf2. Put your FeatherS2 into bootloader mode using the steps explained above and then copy update-tinyuf2.uf2 onto your FeatherS2.
You will see the RGB flash a redish orange colour many times during the copy, and then the FeatherS2 will automatically reboot itself back into the updated UF2 bootloader.
From here you will need to re-copy the CircuitPython firmware back onto the FeatherS2.
If you ever find you have gotten your FeatherS2 into a bad state with CircuitPython - Maybe you accidentally got it stuck in read-only mode or maybe it's stuck in a boot loop, you can put your FeatherS2 into safe mode which wil boot the board, but not run any of the code. You can then fix your issue and reset the board.
To get into safe mode, follow these steps:
If you can't get your FeatherS2 into UF2 bootloader mode, it means you've either stomped it by flashing something else onto the board, or your board shipped prior to the UF2 bootloader being ready for the ESP32S2. Sorry!
Note All boards that shipped since November 2020 have the UF2 bootloader on them.
It is possible to flash your FeatherS2 with the latest UF2 bootloader by following the instructions I have put together in this guide.
If you have any trouble getting this to work, make sure you have joined the Unexpected maker discord server and ping the #FeatherS2 channel, and folks there will be able to help guide you through the process as many have already done it.
You can currently purchase your very own FeatherS2 from